ComfyUI 01: Installation
I've recently started working with ComfyUI, and I'm recording my learning notes as I go. Workflow files and other resources are shared within the community.
Feel free to join if you're interested in learning together.
This lesson covers installation and getting it running.
With Stable Diffusion webui paving the way, ComfyUI installation is much simpler.
Windows Method 1: Official Portable Package
ComfyUI provides an official portable package — just download and run.
https://github.com/comfyanonymous/ComfyUI#installing
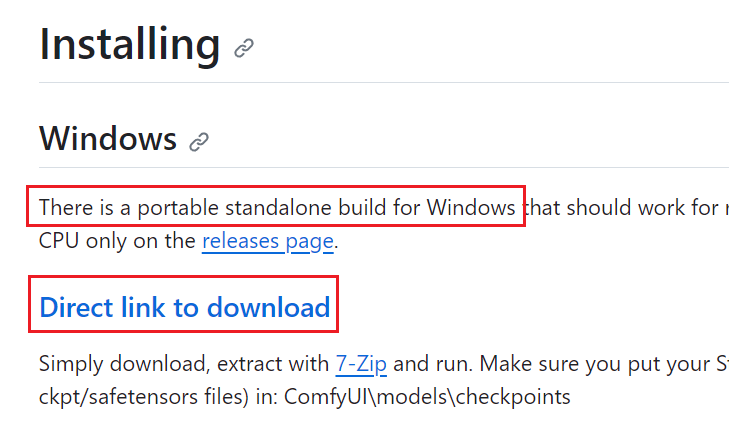
The download is a compressed archive (7z format — most common decompression tools should work; if you don't have one, download from 7-zip.org).
Files after extraction:
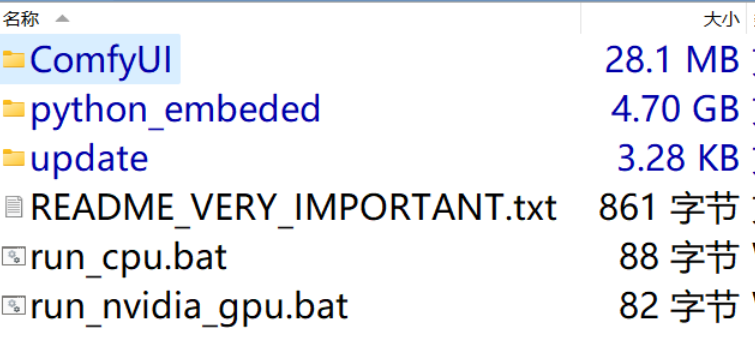
You can see the largest folder is python_embeded, which includes the built-in Python environment, PyTorch, and various other packages needed to run.
There are two startup options:
run_cpu.bat is for CPU mode — use this if you don't have an Nvidia GPU.
run_nvidia_gpu.bat is for GPU mode — use this if you have an Nvidia GPU capable of running AI workloads.
Simply double-click to launch.
Command line window:
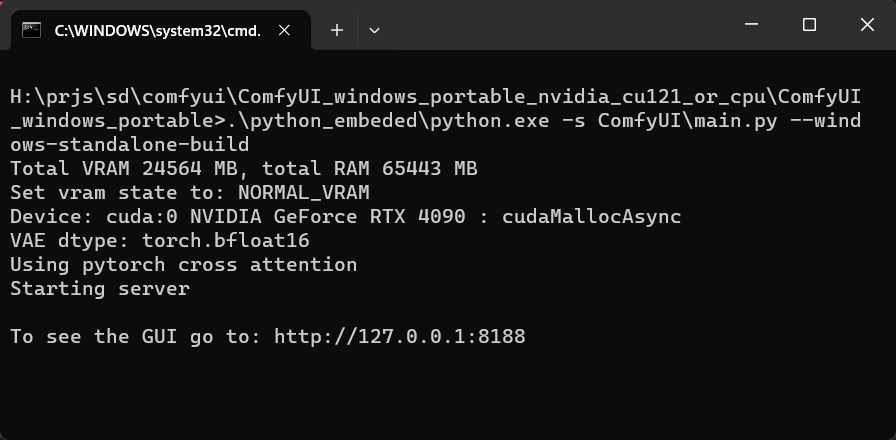
Similar to webui, ComfyUI also opens a web page for its interface, with the default address: 127.0.0.1:8188
Startup screen:
This means installation and startup were successful.
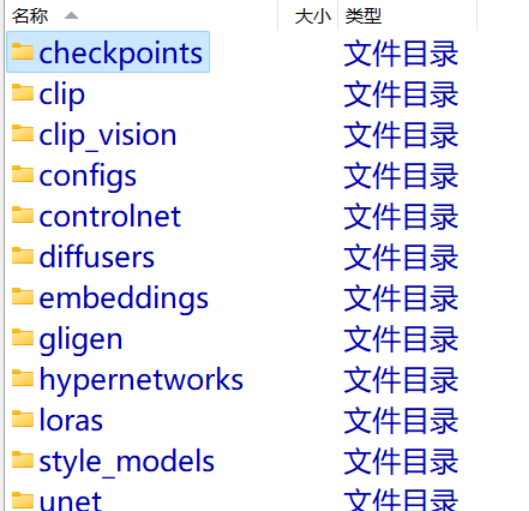
Of course, the portable package doesn't include models. You need to place your models in the ComfyUI folder under models/checkpoints.
checkpoints is where you put the "base models."
There are also folders for clip, controlnet, lora, etc., all organized and ready for you.
You can also refer to my other tutorial on sharing model files between webui and ComfyUI:
How to Share Model Files When Running Multiple Stable Diffusion Installations on One Computer
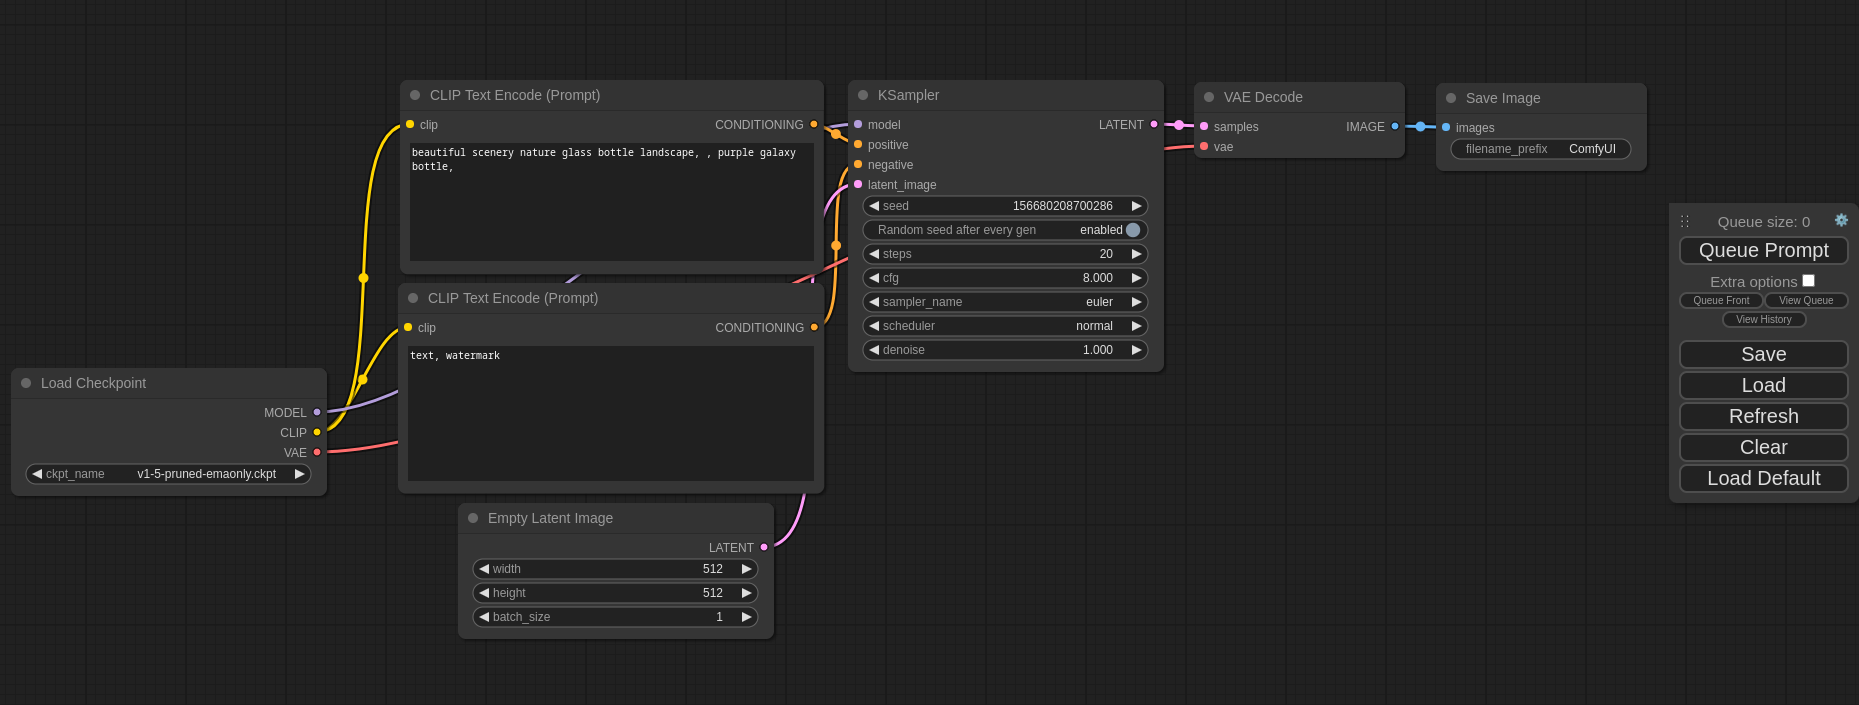
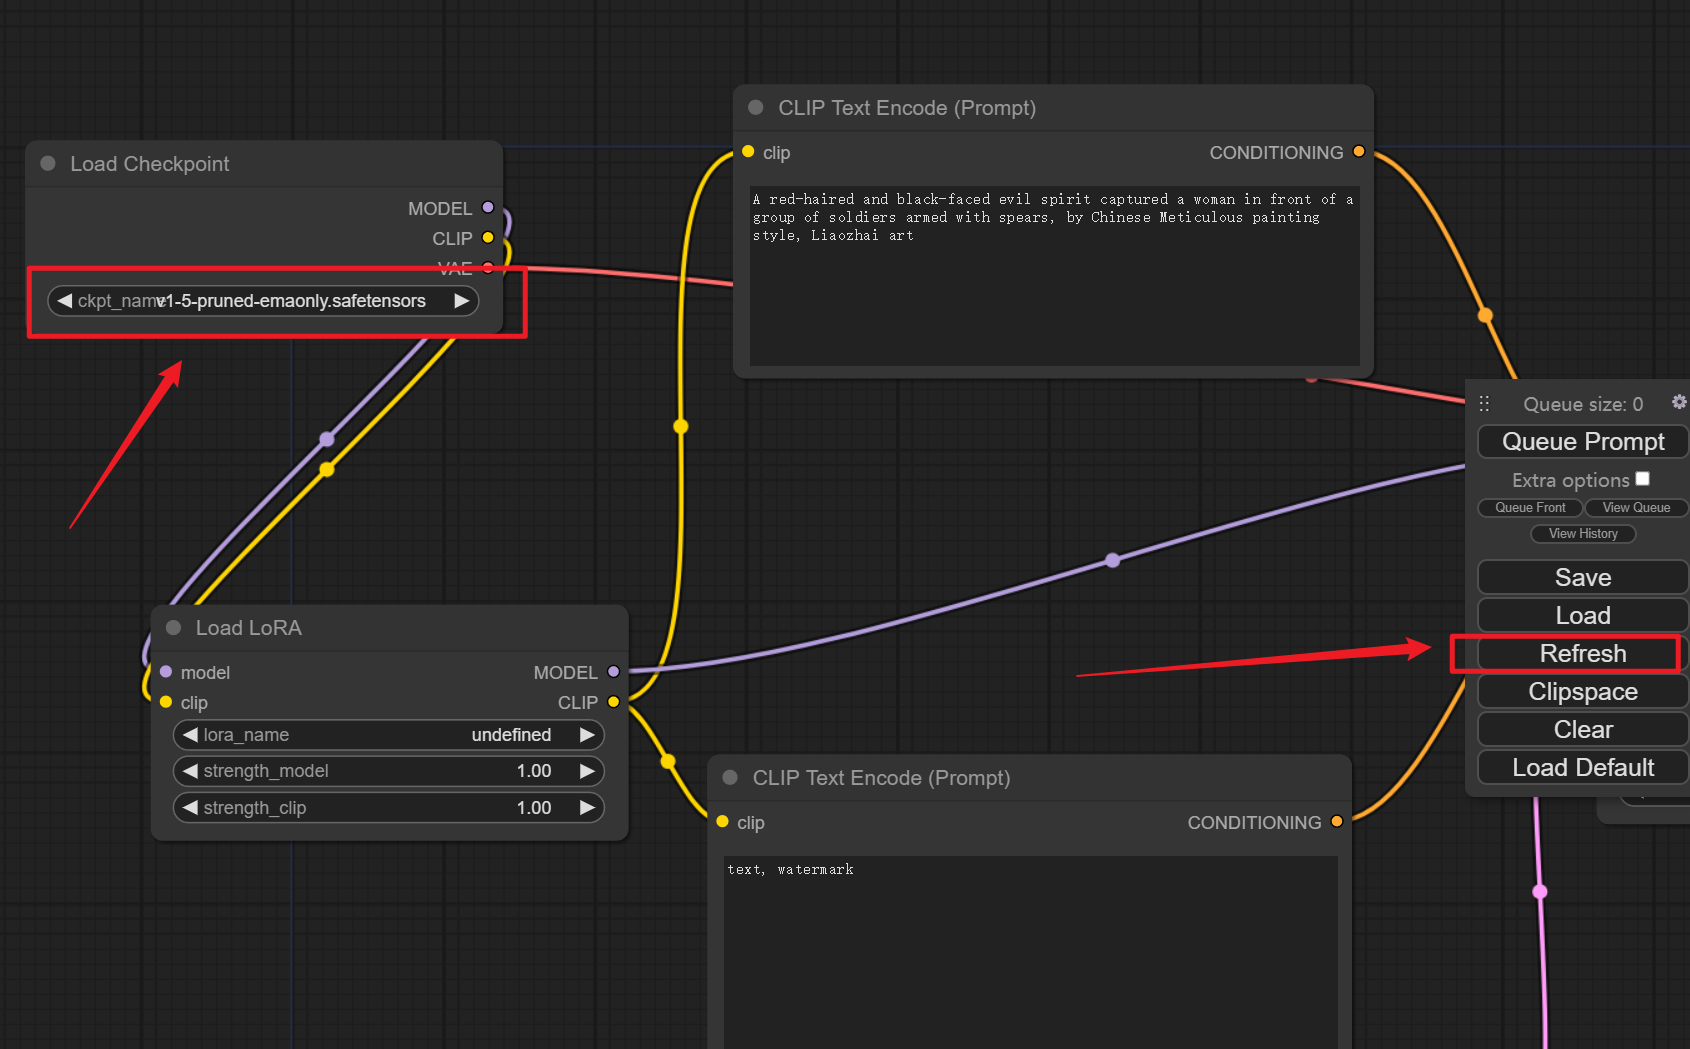
After placing the model files, no restart is needed — click Refresh on the right side, and you'll see the newly added models appear in Load Checkpoint on the left.
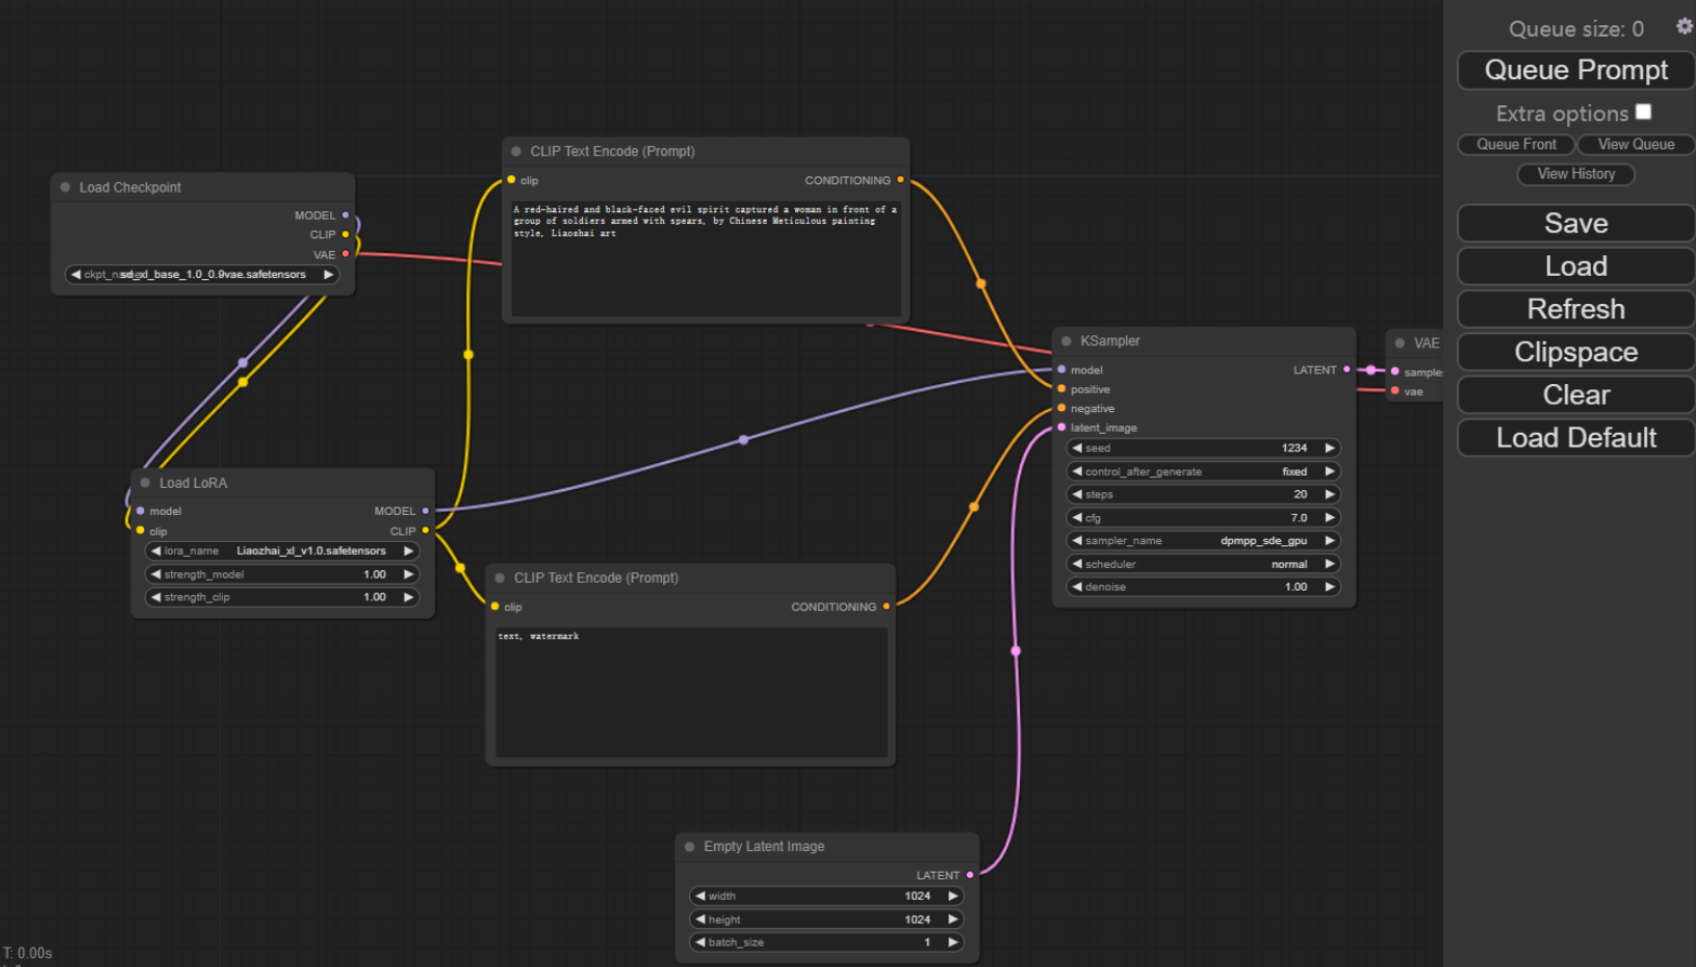
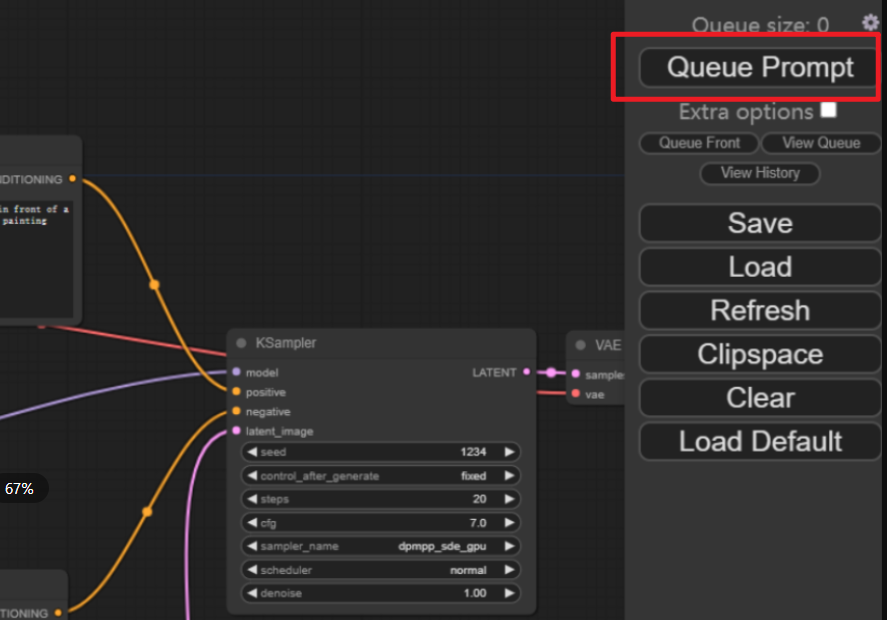
Default prompts are already filled in the CLIP Text Encode (Prompt) nodes in the middle. Click Queue Prompt in the upper right to start generating.
Windows Method 2: Using webui's Existing Environment
If you've previously installed webui, then the environment needed to run ComfyUI is already in place. You can directly git clone the ComfyUI source code and use webui's environment to launch it.
First, git clone the ComfyUI source code.
There are plenty of tutorials on using git. If you're not comfortable with command-line git clone, you can also use the official GitHub Desktop client.
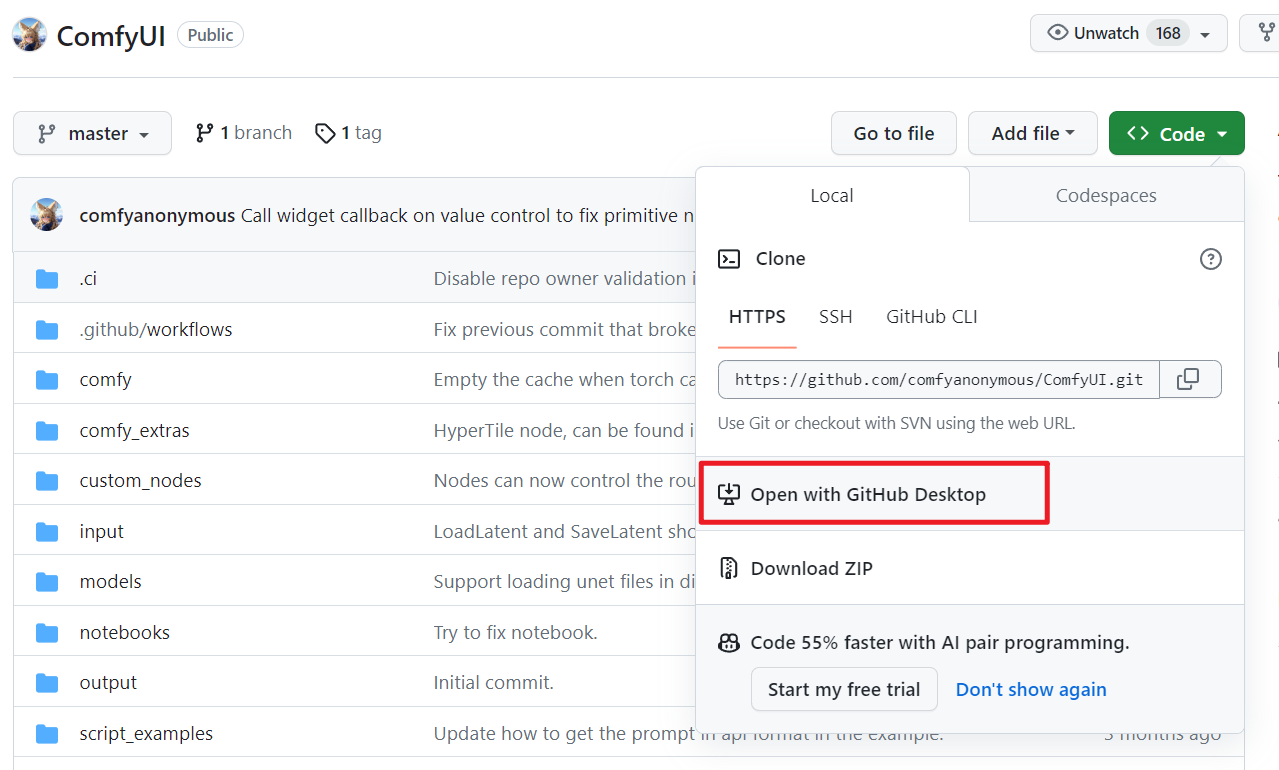
I don't recommend downloading the ZIP source code directly, as it makes updating versions inconvenient. If you can't manage git, go with Windows Method 1.
After cloning, open the ComfyUI folder.
The key trick: use webui's Python environment to launch ComfyUI.
1. If you normally use conda to launch webui
Very simple — just use the same conda environment to run ComfyUI.
- Open a command line window in the ComfyUI folder;
- Switch to webui's conda environment;
- Run python main.py to launch ComfyUI.
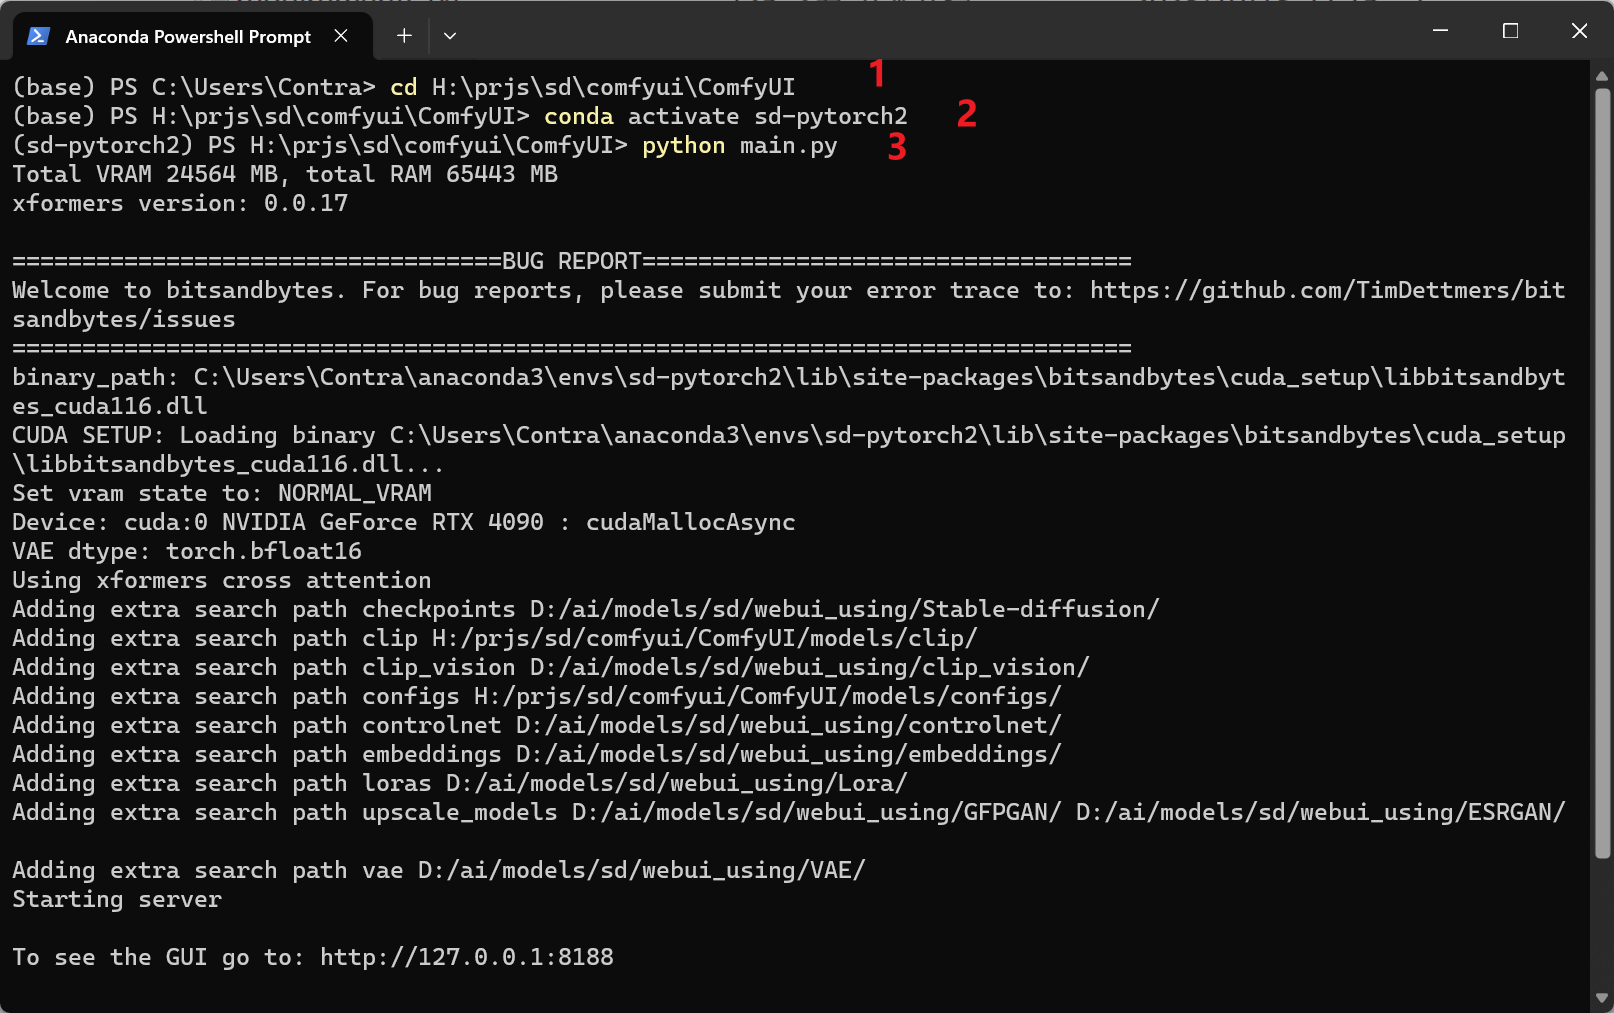
Basic command line and conda operations are covered in the code2art AI art course introductory chapter, and there are plenty of tutorials online as well.
2. If you installed webui using its default method
Then you need to specify the Python inside webui's venv folder to run.
For example, my original webui file structure:
H:\prjs\sd\webui\automatic1111\installtest3\stable-diffusion-webui\venv\Scripts\python.exe
Steps:
- Open Command Prompt (cmd), navigate to the ComfyUI installation directory;
- Activate the original webui directory's venv environment by running
venv\Scripts\activate.bat; My path is quite long — just replace it with your own.H:\prjs\sd\webui\automatic1111\installtest3\stable-diffusion-webui\venv\Scripts\activate.bat
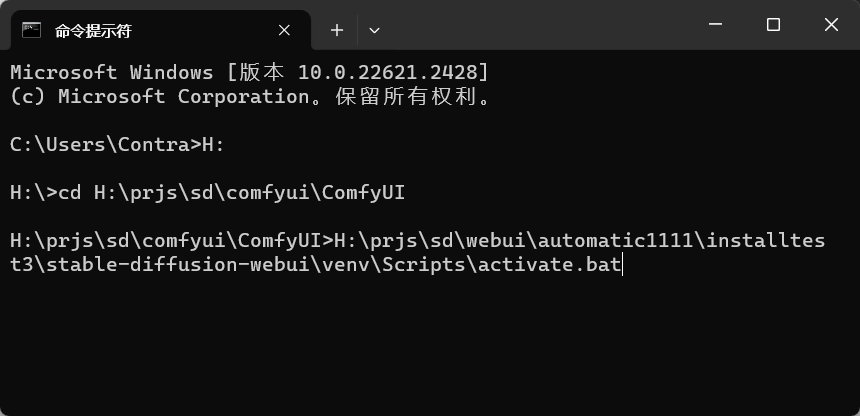
- After activating the environment, continue in the same command line window and run
python main.pyto launch.
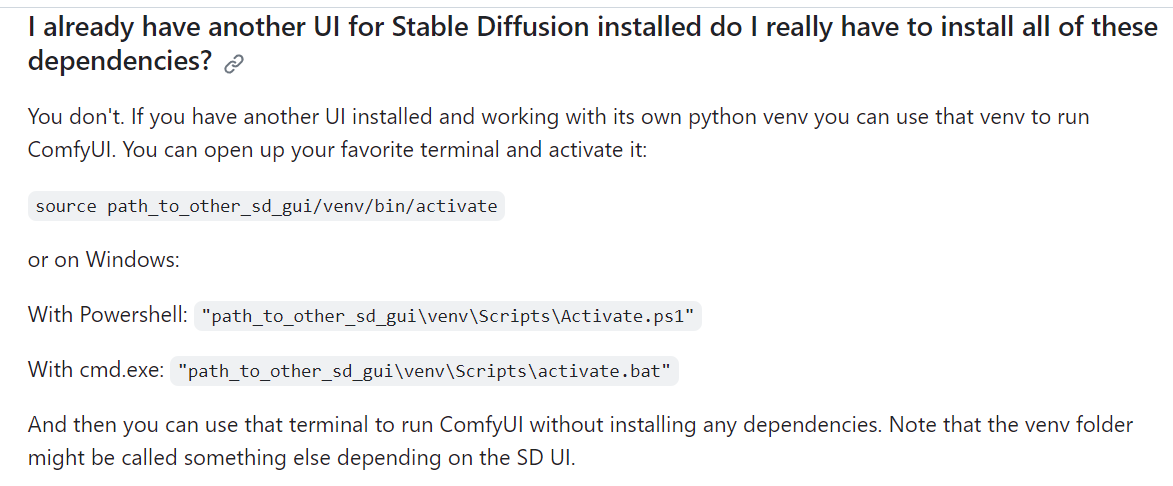
The official website also has a tutorial:
https://github.com/comfyanonymous/ComfyUI#i-already-have-another-ui-for-stable-diffusion-installed-do-i-really-have-to-install-all-of-these-dependencies
Other Manual Installation Methods
For manual installation, or AMD GPUs (Linux only), refer to the official manual installation steps:
https://github.com/comfyanonymous/ComfyUI#manual-install-windows-linux
Mac:
https://github.com/comfyanonymous/ComfyUI#apple-mac-silicon
Follow us on social media: code2art
Community resources & courses: https://ghc.h5.xeknow.com/s/hzkMX
code2art Intelligence Center (membership): https://ghc.h5.xeknow.com/s/2BCFuJ
Cheers🍻
Contra